
Last Saturday, I cancelled my $180 spa appointment. Not because I didn’t need the pampering — trust me, after the week I’d had, every muscle in my body was screaming for attention — but because I realized something that changed how I think about self-care entirely. I could recreate almost every single treatment on that spa menu using ingredients already sitting in my kitchen. And the total cost? Under twenty dollars.
I know that sounds like one of those too-good-to-be-true claims you scroll past on social media. I was skeptical too, the first time a friend suggested it. But here’s the thing: the luxury spa industry has done an incredible job convincing us that relaxation requires marble countertops, white robes, and products with French names we can’t pronounce. The reality? The active ingredients in most high-end treatments are shockingly simple. Honey. Oatmeal. Sea salt. Coconut oil. Your kitchen is basically a spa supply closet that also happens to make dinner.
Over the past year, I’ve refined my at-home spa routine to the point where it genuinely rivals professional experiences I’ve paid hundreds for. I’ve tested dozens of DIY recipes, thrown out the ones that were messy disasters, and kept the ones that actually deliver results you can see and feel. Today, I’m walking you through everything — from setting the perfect atmosphere to specific treatments for your face, body, hands, feet, and hair — so you can build your own spa day that costs less than a large pizza.
Setting the Scene: How to Create a Spa Atmosphere That Actually Works

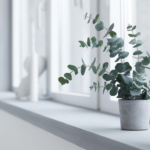
Let’s start with something most DIY spa guides skip over entirely: the environment. You can mix the world’s best face mask, but if you’re applying it in a cluttered bathroom with fluorescent lighting while your phone buzzes every thirty seconds, you’re not going to feel pampered. You’re going to feel like you’re doing a chore with goop on your face.
The first rule of a successful home spa day is committing to the time. Block out at least three hours. Tell everyone in your household that you’re unavailable. Put your phone on do-not-disturb — not silent, not vibrate, full do-not-disturb. The mental shift from “busy person taking a quick break” to “person genuinely dedicating time to themselves” is what separates a face mask Tuesday from a real spa experience.
Next, tackle the atmosphere. Dim the lights or switch to candles. I keep a stash of unscented tea lights specifically for this purpose — a 100-pack costs about three dollars and lasts months. If you have an essential oil diffuser, fill it with lavender or eucalyptus and let it run for about twenty minutes before you start. The scent should be noticeable when you walk in but not overwhelming. If you don’t have a diffuser, boiling a small pot of water with a few drops of essential oil or even some fresh rosemary and lemon slices on the stove creates a surprisingly similar effect.
Music matters more than you’d think. Skip the generic “spa playlist” on Spotify — most of them are weirdly intense with dramatic flute solos that pull you out of relaxation. Instead, search for ambient soundscapes: rain sounds, ocean waves, or simple piano instrumentals. Set the volume low enough that it blends into the background without demanding attention.
Temperature is the secret weapon. Warm up your bathroom by running the shower on hot for a few minutes before you begin. Lay out warm towels — you can heat them in the dryer for five minutes or microwave a damp towel for about sixty seconds. Have a robe or oversized towel ready. These small details signal to your brain that this is different from your daily routine, and that mental shift is genuinely half the experience.
Pro tip: Prepare everything before you start. Line up your ingredients, set out your towels, fill your foot soak basin, and have water or herbal tea within arm’s reach. Nothing kills a spa vibe faster than dripping honey across the kitchen floor because you forgot to grab it beforehand.
DIY Face Masks That Actually Deliver Results

Alright, let’s get into the treatments — starting with the face, because that’s where most of us notice the biggest difference. I’ve tried probably thirty different DIY face mask recipes over the past year, and I’m going to save you the trial-and-error by sharing the three that consistently outperform everything else.
The Honey-Oatmeal Hydration Mask is my go-to for dry or irritated skin. Grind about two tablespoons of plain oatmeal into a fine powder using a blender or food processor. Mix it with one tablespoon of raw honey and one tablespoon of plain yogurt. Apply a thick layer to clean skin and leave it on for fifteen to twenty minutes. The oatmeal soothes inflammation, the honey is a natural humectant that pulls moisture into your skin, and the lactic acid in yogurt provides gentle exfoliation. When you rinse this off, your skin feels like you just walked out of a professional facial.
The Avocado Nourishing Mask is perfect when your skin looks dull or tired. Mash half a ripe avocado with one teaspoon of olive oil and one teaspoon of honey. The healthy fats in avocado penetrate the skin barrier in a way that most commercial moisturizers can’t match. Leave it on for fifteen minutes and rinse with lukewarm water. Your skin will have an immediate glow that lasts well into the next day.
The Egg White Tightening Mask is what I use when I want that “just had a professional treatment” taut feeling. Whisk one egg white until slightly frothy, add a squeeze of lemon juice, and apply in thin layers, letting each layer dry slightly before adding the next. After about ten minutes, you’ll feel it tighten. Rinse with cool water. This is genuinely the closest thing I’ve found to the expensive firming treatments at high-end spas.
Before applying any mask, open your pores with a facial steamer for about five to ten minutes — it makes an enormous difference in how well the ingredients absorb. If you don’t own one, drape a towel over your head and lean over a bowl of hot water with a few drops of tea tree oil. Same principle, slightly less convenient. For those who do regular home facials, though, a dedicated steamer pays for itself almost immediately.
One important note: always patch-test new ingredients on a small area of your inner arm before slathering them on your face. Natural doesn’t mean non-irritating, and the last thing you want from your spa day is an allergic reaction.
Body Scrubs and Soaks: Kitchen-to-Skin Luxury

If face masks are the headliner of your spa day, body treatments are the underrated opening act that often ends up stealing the show. There’s something deeply satisfying about a full-body scrub — that feeling of buffing away dead skin and stepping out of the shower feeling genuinely renewed from neck to toe.
The Brown Sugar Coffee Scrub is the one I come back to again and again. Mix half a cup of used or fresh coffee grounds with half a cup of brown sugar and enough coconut oil to make a thick paste — usually about a quarter cup. The caffeine in coffee temporarily tightens skin and reduces puffiness, the brown sugar provides physical exfoliation without being too abrasive, and the coconut oil moisturizes as you scrub. Use circular motions, focus on rough spots like elbows and knees, and rinse thoroughly. Your skin will be ridiculous smooth.
For a more invigorating option, try a sea salt and olive oil scrub. Coarse sea salt is more aggressive than sugar, so this one’s better for your body than your face. Mix equal parts sea salt and olive oil, add a few drops of peppermint essential oil if you like, and scrub in the shower. The peppermint creates a tingling sensation that wakes up your entire body. Using a natural bristle body scrub brush with your homemade scrub amplifies the exfoliation and helps with circulation — I started dry brushing before my scrubs about six months ago and the difference in my skin texture has been noticeable.
After your scrub, this is the perfect time for a soak. If you have a bathtub, fill it with warm water and add:
- One cup of Epsom salts (magnesium absorption through the skin genuinely helps with muscle tension)
- Half a cup of baking soda (softens water and soothes skin)
- A few drops of your favorite essential oil
- Optional: a cup of whole milk or coconut milk for that Cleopatra-level luxury
Soak for at least twenty minutes. This is your time to close your eyes, breathe deeply, and let the warm water do its work. If you don’t have a bathtub, a long hot shower with your scrub still accomplishes a lot — just spend extra time letting the warm water hit your shoulders and neck.
Cost reality check: A body scrub treatment at a spa runs $80 to $150. A homemade coffee sugar scrub costs roughly $2 in ingredients. Even factoring in the Epsom salt bath, your entire body treatment comes in under $5. The math genuinely doesn’t lie.
Foot Soaks and Hand Treatments: The Details That Make the Difference

Here’s what separates a decent home spa day from one that truly feels professional: attention to your hands and feet. Most people skip these, but they’re actually where you carry the most tension and accumulate the most dry, neglected skin. Treating them properly takes maybe thirty extra minutes and makes the whole experience feel complete.
The Ultimate Foot Soak starts with a basin of warm water — as warm as you can comfortably handle. Add the following:
- Half a cup of Epsom salts
- Two tablespoons of baking soda
- A splash of apple cider vinegar (sounds odd, but it’s antimicrobial and helps soften calluses)
- Five drops of tea tree or peppermint essential oil
- A few thin slices of fresh lemon
Soak your feet for fifteen to twenty minutes while you have a face mask on — this is great multitasking. After soaking, use a pumice stone on any rough patches, paying special attention to heels and the balls of your feet. Then apply a thick layer of coconut oil or shea butter, put on a pair of cotton socks, and let the moisture absorb for at least thirty minutes. The next morning, your feet will feel like they’ve had a professional pedicure.
For hand treatments, I use what I call the “glove method.” Mix one tablespoon of honey with one tablespoon of olive oil and a teaspoon of lemon juice. Massage it into your hands, focusing on cuticles and knuckles — the areas that get driest. Then put on a pair of cotton gloves or even clean socks over your hands. Leave the treatment on for twenty minutes. When you remove the gloves, your hands will be absurdly soft. I do this every spa day without exception, and I consistently get comments about how nice my hands look.
If you want to take the hand treatment up a level, do a quick sugar scrub on your hands first. Equal parts sugar and olive oil, scrub for about sixty seconds, rinse, and then apply the honey treatment. The exfoliation first means the moisturizing ingredients penetrate much deeper.
Something I didn’t expect: consistently doing these hand and foot treatments every two weeks has actually saved me money on professional manicures and pedicures. My nails and cuticles stay in good enough shape that I only need a professional appointment every couple of months instead of every two weeks.
For an extra treat, drop a bath bomb into your foot soak — they add fizz, fragrance, and skin-softening ingredients that make even a simple foot basin feel luxurious. You can often find variety packs that give you enough for several spa days.
Hair Masks: The Treatment You Didn’t Know You Needed

I’ll admit it: hair masks were the last thing I added to my home spa routine, and I regret not starting sooner. We spend so much time thinking about facial skin that we completely ignore the fact that our hair goes through daily assault from heat, products, sun, and environmental damage. A good hair mask once or twice a month can genuinely transform your hair’s texture and shine.
The Coconut Oil Deep Conditioning Mask is the simplest and most effective. Warm about two tablespoons of virgin coconut oil in your hands until it melts — the amount depends on your hair length and thickness. Apply it from mid-shaft to ends, avoiding the roots unless your scalp is particularly dry. Comb through with a wide-tooth comb to distribute evenly, pile your hair on top of your head, and wrap it in a warm damp towel or shower cap. Leave it on for at least thirty minutes — I usually apply it at the start of my spa day and wash it out at the end. The difference in softness and shine after even one treatment is remarkable.
The Banana Avocado Repair Mask is what I use when my hair is feeling particularly damaged or brittle. Blend one ripe banana, half an avocado, and one tablespoon of honey until completely smooth — and I mean completely, because banana chunks in your hair are not the spa experience you’re going for. Apply to damp hair, wrap in plastic wrap or a shower cap, and leave for twenty to thirty minutes. This mask is packed with potassium, natural oils, and vitamins that strengthen hair from the inside out.
For an apple cider vinegar rinse that adds incredible shine, mix two tablespoons of apple cider vinegar with one cup of cool water. After you wash out your hair mask, pour this mixture over your hair as a final rinse. Don’t worry about the smell — it dissipates within minutes as your hair dries. What’s left behind is hair that catches the light in a way that makes people ask what products you use.
A few important hair mask tips I’ve learned the hard way:
- Always detangle before applying. Trying to work a thick mask through tangled hair leads to breakage, which defeats the purpose.
- Warm treatments penetrate better. Wrapping your head in a warm towel or using a shower cap creates heat that opens the hair cuticle and lets the oils absorb more effectively.
- Don’t overdo the oil at the roots. Unless you want to spend thirty minutes trying to shampoo the grease out, keep oil-based masks focused on the mid-lengths and ends.
- Double-shampoo after oil masks. One wash usually isn’t enough to remove coconut oil completely. Lather twice for best results.
The cost of a deep conditioning treatment at a salon ranges from $30 to $75. A coconut oil treatment at home costs roughly fifty cents. Even the banana avocado mask maxes out around $1.50 in ingredients. The results, in my experience, are indistinguishable.
The Real Cost Comparison: DIY vs. Professional Spa Day

Let’s lay this out honestly, because the numbers are what ultimately convinced me to make home spa days a permanent part of my routine. Here’s what a typical professional spa day looks like, price-wise:
- Basic facial: $75 – $150
- Body scrub treatment: $80 – $150
- Foot treatment or pedicure: $45 – $85
- Hand treatment or manicure: $35 – $65
- Hair conditioning treatment: $30 – $75
- Tip (20%): $53 – $105
Professional spa total: $318 – $630
Now here’s the home version:
- Face mask ingredients (honey, oatmeal, yogurt): ~$2
- Body scrub ingredients (coffee, sugar, coconut oil): ~$2
- Epsom salt bath soak: ~$2
- Foot soak ingredients: ~$1.50
- Hand treatment ingredients: ~$1
- Hair mask ingredients: ~$1.50
- Tea lights and ambiance: ~$2
Home spa total: approximately $12
That’s not a typo. Even if you factor in one-time purchases like a face mask application set with brushes and mixing bowls — which makes the whole process feel more professional and less like you’re smearing food on your face — you’re still spending a fraction of the professional price. And those tools last for years.
Now, I want to be fair. There are things a professional spa does better. The massage component is hard to replicate alone. The sheer indulgence of having someone else do everything for you has its own value. And for specialized treatments like chemical peels or microdermabrasion, professionals have training and equipment that matter. I’m not saying never go to a spa.
What I am saying is that for the core treatments — the ones that keep your skin glowing, your body exfoliated, your hair healthy, and your stress levels manageable — you can achieve ninety percent of the results at roughly four percent of the cost. And you can do it every two weeks instead of once every few months when your budget allows.
The real luxury isn’t the price tag. It’s the consistency. Professional spa visits are amazing but rare for most of us. A home spa routine you actually maintain delivers better cumulative results than an occasional splurge ever could.
So here’s my challenge to you: pick one weekend in the next two weeks. Block out three hours. Raid your kitchen. Set up some candles, start a playlist, and give yourself the spa day you’ve been telling yourself you can’t afford. Because you can. You always could. The only thing between you and regular, luxurious self-care is the realization that it was never about the marble countertops — it was about giving yourself permission to slow down, and about twenty dollars’ worth of groceries.
Your skin, your hair, your stress levels, and your wallet will all thank you.


Leave a Reply